Heroku Resarting Dyno Does Not Remove Uploaded Images

Heroku is a well-known PaaS widely used by developers. And as a fun and useful project, you lot can easily brand your own Heroku-like PaaS with Dokku.
What is Heroku?
Heroku is a platform equally a service (PaaS) visitor founded in 2007. The platform runs on AWS, and its ephemeral storage system is chosen "Dyno".
Heroku is one of the most used PaaS by developers and for a good reason– it is easy to apply, well documented, and supports several programming languages.
But what if you could deploy your own Heroku-like platform, including a CI/CD pipeline, database connections, HTTPS connections, and much more with one simple-to-utilise awarding?
Well, that is what Dokku provides and more. Allow'southward take a look.
What is a PaaS?
Platform-as-a-Service (PaaS) is a software architecture style that provides an easy-to-utilise abstraction layer for deploying your application's lawmaking and managing information technology.
This allows y'all to focus on writing business logic rather than worrying almost the platform itself.
PaaS providers usually provide their ain database service besides as other related services, which can profoundly simplify common development tasks.
The great reward of PaaS is that the awarding developer doesn't need to perform whatever system administration work. Instead, you can merely upload your lawmaking and configuration settings to a key server platform.
The service so takes care of deploying the code, scaling it as needed, bankroll up information, treatment hosting and uptime concerns, and so on.
What is Dokku?
Dokku is a hosted Platform as a Service that enables developers to deploy their applications with ease.
From their website:
The smallest PaaS implementation you've ever seen
Dokku is based on Docker and uses Heroku's build-packs to compile and package your applications.
Ane of the best things about Dokku is that it is very lightweight and tin be installed on a single server or VM.
Information technology includes scalable hosting using Docker containers, continuous deployment with Git, and other popular DevOps tools.
Dokku also offers a diverseness of features, such equally support for multiple languages, custom domains, automated deployments, and many more.
Y'all can easily connect Postgres databases and fifty-fifty file storage to your applications.
Yous can check out more information at https://dokku.com/ or the documentation at: https://dokku.com/docs/getting-started/installation/.
You tin also show some love for the open up-source GitHub project here.
How to Install Dokku
In lodge to install Dokku y'all will need a Linux VPS and a domain name.
You can install and use Dokku without a domain name but it is much simpler using a domain. I recommend a deject VPS because it makes it easier to admission and configure.
When connecting a domain, either a single domain or a wildcard can be associated with the server's IP.
I will be using a VPS hosted on Hetzner with Ubuntu twenty.04 installed.
We outset start by making sure that our arrangement is up to date with these commands:
# Update the linux installation $ sudo apt update $ sudo apt upgrade -y Then we tin download and run the installation script for Dokku:
# Install Dokku with the install script $ wget https://raw.githubusercontent.com/dokku/dokku/v0.26.8/bootstrap.sh; $ sudo DOKKU_TAG=v0.26.8 bash bootstrap.sh --> Ensuring nosotros take the proper dependencies --> Notation: Installing dokku for the first time will result in removal of files in the nginx 'sites-enabled' directory. Please manually restore any files that may exist removed after the installation and web setup is complete. Installation will proceed in 10 seconds. [...........] --> Running post-install dependency installation ! Setup a user's ssh key for deployment by passing in the public ssh key equally shown: echo 'CONTENTS_OF_ID_RSA_PUB_FILE' | dokku ssh-keys:add admin The installation script will install Docker and all necessary dependencies and besides Dokku itself, as seen in the code above.
After the installation is complete nosotros demand to assign the SSH keys to access and besides configure our domain name.
In instance you have set up access to your VPS with SSH (which you should) then you already have the necessary keys – y'all just demand to add them to Dokku:
# Assign SSH central to Dokku $ cat ~/.ssh/authorized_keys | dokku ssh-keys:add admin SHA256:6O1TLVOUkWV+zmTWXXXXXXXXXXXXXXXXXXXXXXXXXXXXXX In case you lot don't already accept an SSH central in the server, then you lot demand to generate a key pair:
# Generate SSH key $ ssh-keygen Generating public/individual rsa cardinal pair. Enter file in which to save the key (/root/.ssh/id_rsa): Enter passphrase (empty for no passphrase): Enter same passphrase again: Your identification has been saved in /root/.ssh/id_rsa Your public key has been saved in /root/.ssh/id_rsa.pub The fundamental fingerprint is: SHA256:7T6BbRCVWjGtcSUXXXXXXXXXXXXXXXXXXXXXXXXXXXXX root@freeDokku The fundamental's randomart prototype is: +---[RSA 3072]----+ [.................] | . oS*.o . . | [.................] +----[SHA256]-----+ And then yous can add it to Dokku:
# Add SSH key to Dokku $ dokku ssh-keys:add admin /root/.ssh/id_rsa.pub SHA256:7T6BbRCVWjGtcSUXXXXXXXXXXXXXXXXXXXXXXXX Next, and the final step, is to assign the domain for your Dokku installation. Nosotros do that with the control:
# Set up installation global domain $ dokku domains:ready-global domain.com -----> Set domain.com Make sure you replace 'domain.com' with your ain domain, and that your domain name DNS points to the server's IP address.
And that is all you demand to do to install and set upwardly Dokku. It is really that elementary.
Yous tin now beginning adding your applications.
Let's see an example of that by adding a standard Django awarding in the next department.
How to Create Your Application in Dokku
To create and deploy our first application, there is some preparation piece of work nosotros need to exercise on Dokku.
To deploy an application on Dokku, follow these steps:
- Create the application on Dokku, which ways giving it a proper noun.
- Create the associate database (or other plugins, if needed). This will create and provision a database for use with an automated DATABASE_URL added to the application for ease of deployment.
- Push button the necessary code to Dokku's application internal GitHub endpoint. This can include likewise the necessary release steps (similar running Django migrations, for instance).
After the lawmaking is pushed, Dokku volition generate whatever necessary Docker container and will run our application with any associated databases (or other plugins).
Now that we've covered the necessary steps, permit's become through them in practice.
Let'south commencement by creating our application. For this tutorial, I will create a very unproblematic Django website that contains all the necessary logic for us to test Dokku.
Nosotros create an application on Dokku with this command (in the server where nosotros installed Dokku):
# Creating our awarding on Dokku $ dokku apps:create djangotutorial -----> Creating djangotutorial... Past default, datastores (or databases) are non created when an awarding is created.
The datastores are handled past a series of plugins. You can bank check here for all available plugins.
For our awarding, we will create a Postgres datastore. Since by default no plugins are installed, we first need to install the Postgres plugin:
# install the postgres plugin # plugin installation requires root, hence the user change sudo dokku plugin:install https://github.com/dokku/dokku-postgres.git Then we tin can create our Postgres datastore:
# Create a Postgres datastore $ dokku postgres:create djangotutorial_datastore Waiting for container to be prepare Creating container database Securing connection to database =====> Postgres container created: djangotutorial_datastore =====> djangotutorial_datastore postgres service information Config dir: /var/lib/dokku/services/postgres/djangotutorial_datastore/information Config options: Data dir: /var/lib/dokku/services/postgres/djangotutorial_datastore/data Dsn: postgres://postgres:ea706cc108c805d5124d134d934024c5@dokku-postgres-djangotutorial-datastore:5432/djangotutorial_datastore Exposed ports: - Id: 782a04fe6bbd25958752c17c304358fd5ec1f3c54d6d53175b6481b3b957d94b Internal ip: 172.17.0.5 Links: - Service root: /var/lib/dokku/services/postgres/djangotutorial_datastore Status: running Version: postgres:14.i We can check that our Docker container for the datastore is already upward and running with:
# Check running containers $ docker ps CONTAINER ID IMAGE Command CREATED Condition PORTS NAMES 782a04fe6bbd postgres:14.1 "docker-entrypoint.s…" Nigh a minute ago Upward Virtually a minute 5432/tcp dokku.postgres.djangotutorial_datastore At present that we have the datastore up and running, we need to acquaintance it with our application:
# Associate datastore with the awarding $ dokku postgres:link djangotutorial_datastore djangotutorial -----> Setting config vars DATABASE_URL: postgres://postgres:ea706cc108c805d5124d134d934024c5@dokku-postgres-djangotutorial-datastore:5432/djangotutorial_datastore -----> Restarting app djangotutorial ! App paradigm (dokku/djangotutorial:latest) non establish Yous tin come across that a DATABASE_URL is automatically created and associated with the awarding.
The example above mentions that our application epitome is not found because we haven't pushed any code to it even so.
We tin can bank check our application's environs variables to ostend that our DATABASE_URL is present:
# Checking an awarding environment variables $ dokku config:show djangotutorial =====> djangotutorial env vars DATABASE_URL: postgres://postgres:ea706cc108c805d5124d134d934024c5@dokku-postgres-djangotutorial-datastore:5432/djangotutorial_datastore We now have all the necessary configurations done on the Dokku side to support the deployment of our awarding.
Side by side, we volition create the lawmaking for our application and deploy that to Dokku for an automated CI/CD pipeline.
How to Create Our Awarding Code on PyCharm
Before we can deploy an application, we need to accept its source code to push to Dokku.
For this tutorial, nosotros are going to create a very elementary Django application that shows also the use of the Postgres database.
We will be using PyCharm as our IDE to create and manage our project.
We create a new project in PyCharm – let'southward phone call it 'DjangoTutorial':
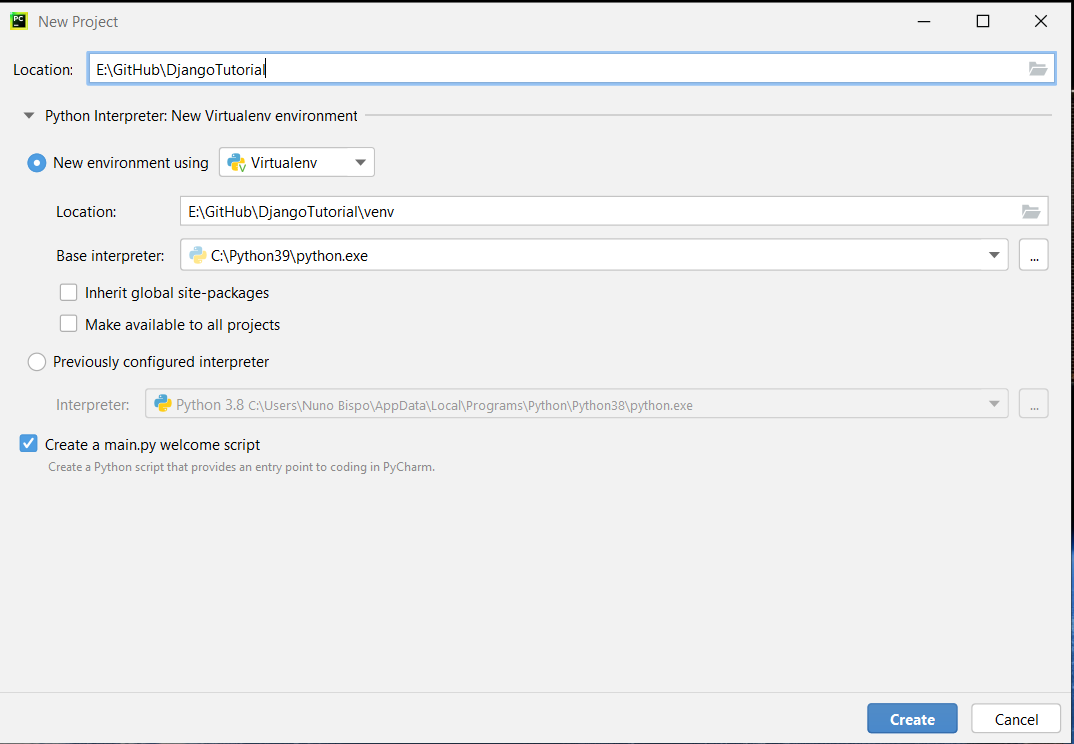
I personally adopt to create new projects with a virtual environs already in place, which makes life much easier.
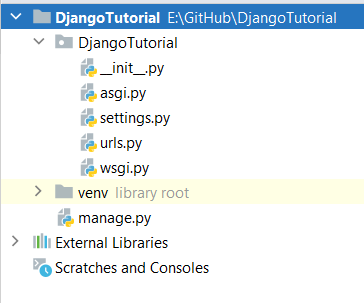
If y'all created the project with a default chief.py file (like I did because I keep forgetting to remove the checkmark), y'all can safely delete information technology now. We are non going to use it.
The first footstep is, of course, to install Django and so we can build our awarding. We practice that install using pip:
$ pip install django Collecting django Downloading Django-iv.0.ii-py3-none-any.whl (8.0 MB) |████████████████████████████████| 8.0 MB vi.4 MB/southward Collecting sqlparse>=0.ii.2 Using buried sqlparse-0.4.2-py3-none-any.whl (42 kB) Collecting tzdata Using cached tzdata-2021.5-py2.py3-none-any.whl (339 kB) Collecting asgiref<4,>=iii.4.1 Downloading asgiref-3.5.0-py3-none-any.whl (22 kB) Installing collected packages: tzdata, sqlparse, asgiref, django Successfully installed asgiref-3.5.0 django-4.0.two sqlparse-0.four.2 tzdata-2021.five Then we create our Django project with:
$ django-admin startproject DjangoTutorial . Notice the '.' at the end of the command. I like to use that so that it creates the projection in the current directory instead of creating an extra sub-directory.
You should now take a project structure like this in PyCharm:
We tin run our projection with the standard Django run:
$ python manage.py runserver Watching for file changes with StatReloader Performing system checks... System check identified no bug (0 silenced). Yous take xviii unapplied migration(due south). Your project may not work properly until you lot utilise the migrations for app(s): admin, auth, contenttypes, sessions. Run 'python manage.py migrate' to utilize them. Feb 02, 2022 - 16:49:27 Django version iv.0.2, using settings 'DjangoTutorial.settings' Starting development server at http://127.0.0.i:8000/ Quit the server with CTRL-Intermission. We have not yet applied our migrations, so we volition do that side by side after we talk over the database configuration for both local and Dokku access.
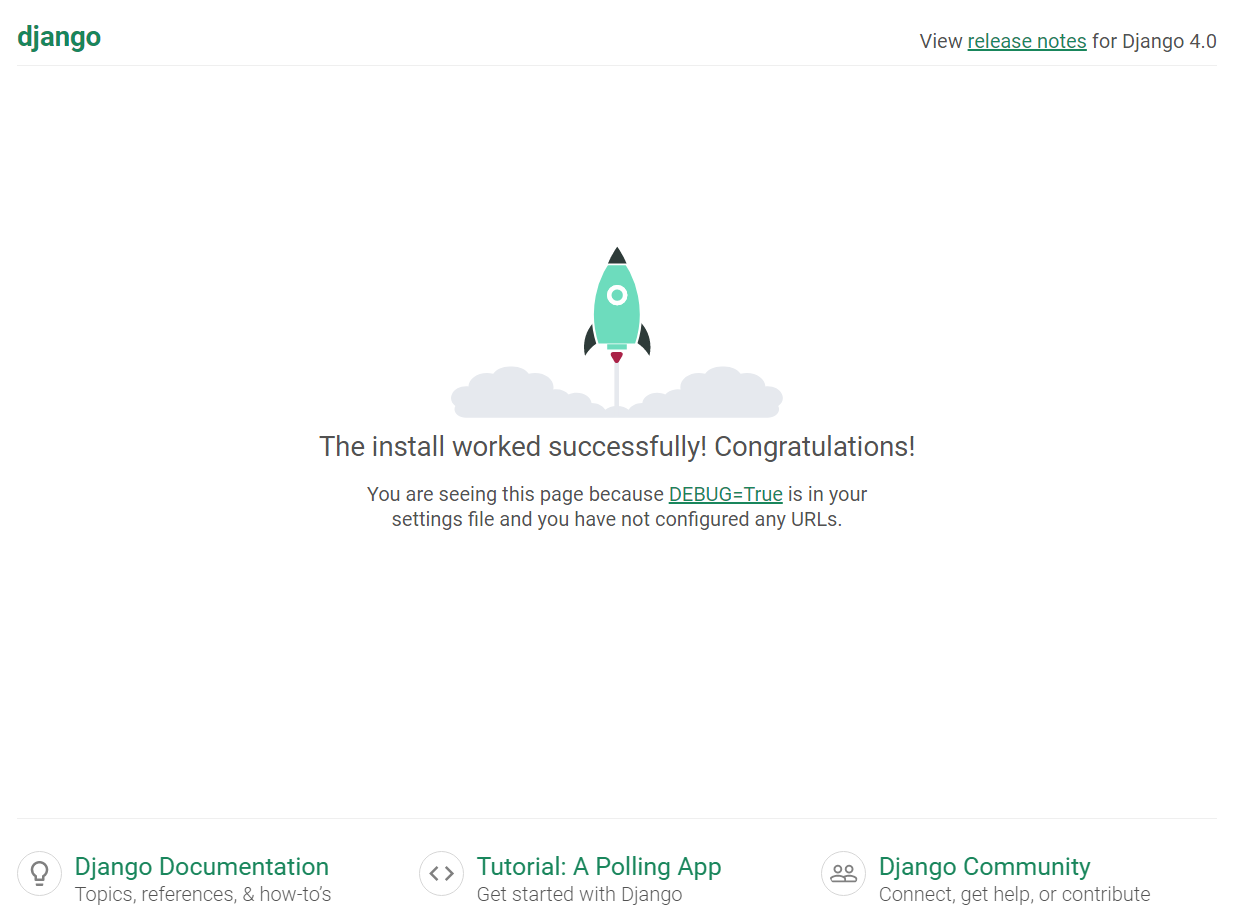
Navigating to the link http://127.0.0.i:8000/, we can now access our standard Django welcome folio:
We have our Django installation upwards and running so now nosotros can start building the rest of the project.
Like most projects, we will need to shop data in a database (or database using the Dokku naming).
We also desire to be able to debug and run our application locally on the development car (using a local database, in this SQLite) and run it on the cloud with Dokku using the Postgres database.
This means nosotros need to change some configuration in our settings.py to be able to back up both use cases without u.s. needing to change any flags or configs every time.
We start by installing the package dj-database-url with:
# Install packages for the database url $ pip install dj-database-url $ pip install psycopg2 # We also install this package to be able to apply surroundings variables $ pip install python-decouple This bundle enables united states to take a Django database connection dictionary, populated with all the data by merely specifying a database URL.
With the package install, let'southward update the configuration on the settings.py:
# We need to add this import at the first to use environment variables import dj_database_url from decouple import config from django.conf.global_settings import DATABASES ..... # Let'south likewise updated the allowed host so we tin can use it later on ALLOWED_HOSTS = config('ALLOWED_HOSTS').split(',') ..... # We supercede the default database configuration from Django with this one # Database # https://docs.djangoproject.com/en/4.0/ref/settings/#databases # DATABASE URL DATABASES['default'] = dj_database_url.parse(config('DATABASE_URL'),conn_max_age=600) We will also need to create '.env' file in the root dir of our project:
#HOST SETTINGS ALLOWED_HOSTS = 127.0.0.i #DATABASE SETTINGS DATABASE_URL='sqlite:///db.sqlite3' As y'all can see, with this change nosotros can use the database URL from the local '.env' file on the local development machine, so on Dokku it volition automatically apply the already defined DATABASE_URL that was created when we linked the datastore to the application on Dokku.
We can now create our first (and only) web page of this tutorial), a uncomplicated counter that stores and read the value from the database.
Allow's create a separate awarding to incorporate our logic:
$ python manage.py startapp counter We now should accept a new folder called 'counter' in our project. Let's add together a new model by opening the 'models.py' file:
from django.db import models form Counter(models.Model): count = models.IntegerField(default=0) def __str__(self): render self.count Nosotros can now add together a new URL to load our counter folio. We do that by calculation a new file chosen 'urls.py' to our 'counter' folder:
from django.urls import path from . import views urlpatterns = [ path('counter/', views.counter, name='counter'), ] Nosotros now have both the model and the URL to load our exam page. All nosotros demand now is the view and HTML template to render the page.
Let's create the view by editing the 'views.py' file:
from django.shortcuts import render from .models import Counter def counter(request): counter_value = Counter.objects.terminal() if counter_value is None: counter_value = Counter(count=0) counter_value.save() if request.method == 'POST': counter_value.count += 1 counter_value.salve() return return(asking, 'counter.html', {'counter': counter_value.count}) At present nosotros can create our HTML template to show the counter value on the page. We create a new file called 'counter.html' inside a new 'templates' folder:
<!DOCTYPE html> <html lang="en"> <head> <meta charset="UTF-8"> <title>Counter</title> </head> <body> <form method="post"> {%csrf_token%} <h4>Counter value is: {{ counter }}</h4> <input type="submit" name="submit" value="Increase Counter"> </form> </body> </html> The last pace is to add together our newly created application to the 'settings.py' file in gild for Django to recognize it:
..... INSTALLED_APPS = [ 'counter', 'django.contrib.admin', 'django.contrib.auth', 'django.contrib.contenttypes', 'django.contrib.sessions', 'django.contrib.messages', 'django.contrib.staticfiles', ] ..... And the URL to our master URLs file:
from django.contrib import admin from django.urls import path, include urlpatterns = [ path('', include('counter.urls')), path('admin/', admin.site.urls), ] With all the necessary lawmaking and HTML in place, nosotros can now create and run our migrations to create our new model in the database. We first do that on the local server by running:
# Create and run migrations $ python manage.py makemigrations $ python manage.py drift Operations to perform: Apply all migrations: admin, auth, contenttypes, counter, sessions Running migrations: Applying contenttypes.0001_initial... OK Applying auth.0001_initial... OK Applying admin.0001_initial... OK Applying admin.0002_logentry_remove_auto_add... OK Applying auth.0009_alter_user_last_name_max_length... OK Applying auth.0010_alter_group_name_max_length... OK Applying auth.0011_update_proxy_permissions... OK Applying auth.0012_alter_user_first_name_max_length... OK Applying counter.0001_initial... OK Applying sessions.0001_initial... OK As yous can come across, we not only applied the migrations for our new application but we likewise run the initial migrations for the other Django applications since this was the first fourth dimension we ran the migrations.
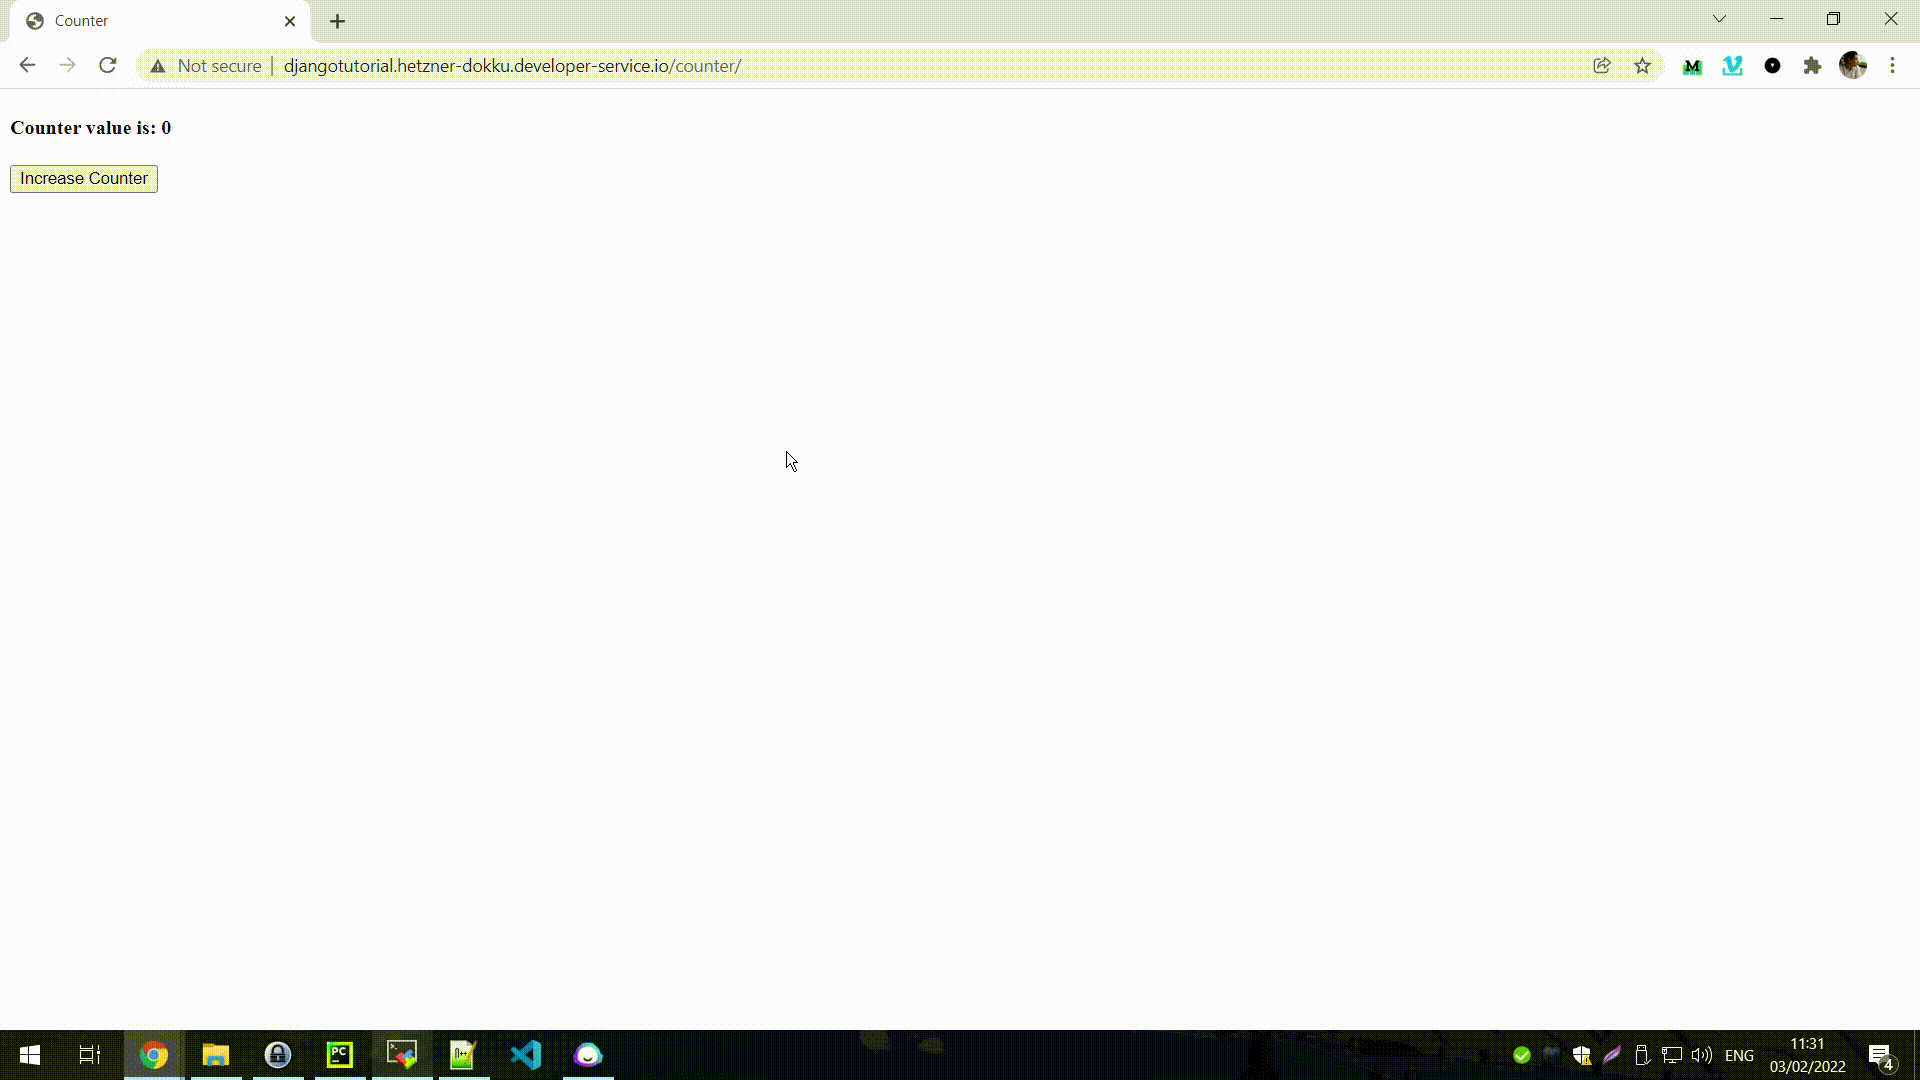
We can once more run our server locally and we should be able to admission the URL http://127.0.0.1:8000/counter/ and increment the counter:

As you tin meet, reloading the page keeps our counter value, meaning that the value is been stored in the database with our model.
How to Deploy Our Application to Dokku
Nosotros now accept a very elementary application running with database integration to store our counter value.
We are ready to deploy it to the deject so nosotros can exam it there and make sure our database is also working in the cloud.
Before nosotros exercise the Git push to deploy the code to Dokku, we need to practise some grooming:
- Install our web server (gunicorn)
- Create our requirements file (for our packages)
- Create our Procfile (for our deployment commands)
Let's start with installing our web server to use in the deject:
# Install our web server $ pip install gunicorn With our packages in place we can now create our requirements file with:
# Create requirements file $ pip freeze > requirements.txt Now nosotros demand to create the 'Procfile'. This file is used past Dokku to determine which commands to run on deployment and after deployment.
So permit's create a new file called 'Procfile' in the root directory with the contents:
web: gunicorn DjangoTutorial.wsgi release: python manage.py migrate We have created two commands for Dokku to run:
- release – this command is executed on the deployment of our awarding in Dokku. We employ it to drift our database.
- spider web – this command allows Dokku to know which webserver to run to allow access to the application.
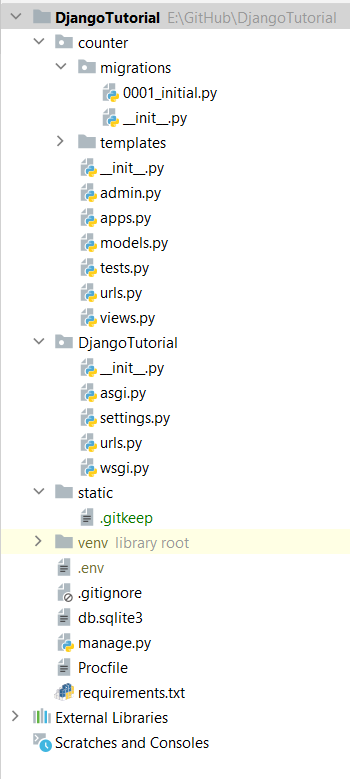
Finally, to make sure that we tin can collect whatever static files when our code is deployed to Dokku, nosotros demand to create a new directory called 'static' on the root directory. Inside nosotros create an empty file chosen '.gitkeep' (this will allow us to add the directory to the Git repository afterwards).
We besides need to add this path for the static files to our 'settings.py' file:
# Static files (CSS, JavaScript, Images) # https://docs.djangoproject.com/en/iv.0/howto/static-files/ STATIC_URL = 'static/' STATIC_ROOT = BASE_DIR / "static" Now all the files and logic are in place and we tin deploy to Dokku with a standard Git push button. Allow's bank check our current file structure:
To be able to push our lawmaking to Dokku, nosotros need to add our project to a Git repository.
Since nosotros don't desire to push all the files from our folder structure to the Dokku git repository, nosotros create a '.gitignore' to exclude certain files and directories. I use the contents of this first-class Gist to populate the file:
python pycharm gitignore
python pycharm gitignore. GitHub Gist: instantly share code, notes, and snippets.
 Gist
Gist

We tin at present initialize and commit our lawmaking to a Git repository locally:
# Initialize repository $ git init -b main # Add and commit our files $ git add . && git commit -m "initial commit" [main (root-commit) e77a16a] initial commit xx files changed, 438 insertions(+) create mode 100644 .gitignore create manner 100644 DjangoTutorial/__init__.py create style 100644 counter/tests.py create mode 100644 counter/urls.py create manner 100644 counter/views.py create mode 100644 db.sqlite3 create mode 100644 manage.py create way 100644 requirements.txt With our repository committed, we tin can at present push it to a remote repository, that is the Dokku Git repository for our application:
# Adding our remote repository (supplant domain.com with your domain proper noun) $ git remote add dokku dokku@domain.com:djangotutorial # Time to push our code to the remote repository $ git push button dokku principal Enumerating objects: 34, done. Counting objects: 100% (34/34), done. Delta compression using up to 8 threads Compressing objects: 100% (31/31), done. Writing objects: 100% (34/34), eleven.41 KiB | 402.00 KiB/s, done. Total 34 (delta seven), reused 0 (delta 0) -----> Set master to DOKKU_DEPLOY_BRANCH. -----> Cleaning upwardly... -----> Building djangotutorial from herokuish -----> Adding BUILD_ENV to build surroundings... BUILD_ENV added successfully -----> Python app detected -----> No Python version was specified. Using the buildpack default: python-3.9.9 To utilize a different version, see: https://devcenter.heroku.com/articles/python-runtimes -----> No alter in requirements detected, installing from cache -----> Installing python-3.ix.9 -----> Installing pip 21.iii.1, setuptools 57.5.0 and cycle 0.37.0 -----> Installing SQLite3 -----> Installing requirements with pip Collecting asgiref==3.5.0 Downloading asgiref-3.5.0-py3-none-any.whl (22 kB) Collecting dj-database-url==0.v.0 Downloading dj_database_url-0.5.0-py2.py3-none-any.whl (v.5 kB) Collecting Django==4.0.2 Downloading Django-4.0.2-py3-none-any.whl (8.0 MB) Collecting gunicorn==twenty.1.0 Downloading gunicorn-20.1.0-py3-none-whatsoever.whl (79 kB) Collecting psycopg2==2.9.iii Downloading psycopg2-2.9.iii.tar.gz (380 kB) Preparing metadata (setup.py): started Preparing metadata (setup.py): finished with status 'done' Collecting python-decouple==3.v Downloading python_decouple-3.5-py3-none-any.whl (nine.6 kB) Collecting sqlparse==0.4.two Downloading sqlparse-0.4.2-py3-none-any.whl (42 kB) Collecting tzdata==2021.5 Downloading tzdata-2021.five-py2.py3-none-whatsoever.whl (339 kB) Building wheels for collected packages: psycopg2 Building cycle for psycopg2 (setup.py): started Building cycle for psycopg2 (setup.py): finished with condition 'done' Created wheel for psycopg2: filename=psycopg2-2.9.3-cp39-cp39-linux_x86_64.whl size=579484 sha256=9d6a2810a5d766738526d6f411e5e9ce514cce882b6c80a47a13c02dc7529e02 Stored in directory: /tmp/pip-ephem-wheel-enshroud-8k0chg5g/wheels/b3/a1/6e/5a0e26314b15eb96a36263b80529ce0d64382540ac7b9544a9 Successfully built psycopg2 Installing collected packages: sqlparse, asgiref, tzdata, python-decouple, psycopg2, gunicorn, Django, dj-database-url Successfully installed Django-4.0.2 asgiref-3.5.0 dj-database-url-0.5.0 gunicorn-xx.1.0 psycopg2-ii.nine.3 python-decouple-3.5 sqlparse-0.four.2 tzdata-2021.5 -----> $ python manage.py collectstatic --noinput 128 static files copied to '/tmp/build/static'. -----> Discovering process types Procfile declares types -> release, web -----> Releasing djangotutorial... -----> Checking for predeploy chore No predeploy job establish, skipping -----> Checking for release task -----> Executing release job from Procfile: python manage.py migrate =====> Get-go of djangotutorial release task (a602cab30) output Operations to perform: Apply all migrations: admin, auth, contenttypes, counter, sessions Running migrations: Applying contenttypes.0001_initial... OK Applying auth.0001_initial... OK Applying admin.0001_initial... OK Applying admin.0002_logentry_remove_auto_add... OK Applying admin.0003_logentry_add_action_flag_choices... OK Applying contenttypes.0002_remove_content_type_name... OK Applying auth.0002_alter_permission_name_max_length... OK Applying auth.0003_alter_user_email_max_length... OK Applying auth.0004_alter_user_username_opts... OK Applying auth.0005_alter_user_last_login_null... OK Applying auth.0006_require_contenttypes_0002... OK Applying auth.0007_alter_validators_add_error_messages... OK Applying auth.0008_alter_user_username_max_length... OK Applying auth.0009_alter_user_last_name_max_length... OK Applying auth.0010_alter_group_name_max_length... OK Applying auth.0011_update_proxy_permissions... OK Applying auth.0012_alter_user_first_name_max_length... OK Applying counter.0001_initial... OK Applying sessions.0001_initial... OK =====> Finish of djangotutorial release job (a602cab30) output -----> App Procfile file found =====> Processing deployment checks No CHECKS file found. Simple container checks volition exist performed. For more efficient zippo downtime deployments, create a CHECKS file. See https://dokku.com/docs/deployment/zero-downtime-deploys/ for examples -----> Deploying djangotutorial via the docker-local scheduler... -----> Deploying web (count=1) Attempting pre-flight checks (web.1) Waiting for 10 seconds (web.1) Default container check successful (web.one) -----> Deploying release (count=0) -----> Running mail-deploy -----> Creating new app virtual host file... -----> Configuring djangotutorial.domain.com...(using congenital-in template) -----> Creating http nginx.conf Reloading nginx -----> Renaming containers Renaming container djangotutorial.spider web.1.upcoming-7101 (f8d229ebd8bc) to djangotutorial.web.1 -----> Checking for postdeploy task No postdeploy task found, skipping -----> Updated schedule file =====> Awarding deployed: http://djangotutorial.domain.com To domain.com:djangotutorial * [new branch] main -> main We have but deployed our application to Dokku.
What just happened? Well, Dokku did a lot of piece of work for us:
- Installed Python
- Installed the requirements
- Nerveless the static files
- Performed the migrations
- And finally started a gunicorn server to deploy our application
If you had a permission error, then your private key should be registered within your local development environment. If you lot get a permission denied fault when pushing, you lot can register your private key as follows: ssh-add together -k ~/<your individual primal>.
You may likewise meet an error regarding the ALLOWED_HOSTS when accessing the application. In that case, all yous demand to do is to run the following command on the Dokku server to prepare the environment variable to the correct value:
# Set up ALLOWED_HOSTS environment variable (make certain to use your domain proper name) $ dokku config:prepare djangotutorial ALLOWED_HOSTS=djangotutorial.domain.com We can now admission and test our awarding at the above URL:
Congratulations, you lot only deployed your application on Dokku.
How to Add SSL with Let'south Encrypt
One last configuration that we can practice is to add SSL security to our application past installing a Let's Encrypt SSL document.
We can do this very hands on Dokku with the Permit'south Encrypt plugin:
# Install the Let's Encrypt plugin sudo dokku plugin:install https://github.com/dokku/dokku-letsencrypt.git # Configure the plugin (brand sure to supplant to your email) dokku config:set --global DOKKU_LETSENCRYPT_EMAIL=e-mail@domain.com # gear up a custom domain that you ain for your application dokku domains:set djangotutorial djangotutorial.your.domain.com # Enable Permit'due south Encrypt dokku letsencrypt:enable djangotutorial # Enable Let'south Encrypt machine-renewal dokku letsencrypt:cron-job --add together Now we have a more secure application. After all, our counter is very of import.
Conclusion
Using a PaaS makes a programmer's life easier when building web applications.
Yous can use hosted PaaS like Heroku and there are many others, so the choice is there.
But there are some main drawbacks:
- Price – hosted solutions might accept limits in terms of database storage or file storage, among others
- You lot don't control the hosting where the PaaS is deployed. Recent examples of AWS shows that not even the biggest hosting is complimentary of problems.
Y'all tin can work around these issues by self-hosting your PaaS.
This allows for more command in terms of pricing. You tin use hosting provider similar Digital Bounding main, Hetzner, and others who have quite inexpensive VPSs that work perfectly with Dokku.
There are no database limits. The only limits you might have are retentivity and disk space, but you tin e'er upgrade your VPS for a smaller price than getting a new database at Heroku.
Dokku is easy to install and like nosotros saw. Creating and deploying an application is a 3 step process:
- Create an awarding on Dokku
- Create a datastore on Dokku (if needed, similar Postgres) and link to the application
- Deploy your lawmaking to Dokku with Git
Additionally, you might demand to configure some environment variables and SSL certificates, but that is all.
Dokku is really the smallest PaaS implementation.
Full source code for the Django application is bachelor at:
GitHub - nunombispo/DjangoTutorial: Instance awarding for freeCodeCamp article.
Instance application for freeCodeCamp article. Contribute to nunombispo/DjangoTutorial evolution past creating an account on GitHub.
GitHub
Follow me on Twitter: https://twitter.com/DevAsService
Cheque out my website at: https://developer-service.io/
Or bank check out my blog at: https://blog.developer-service.io/
Learn to code for free. freeCodeCamp'due south open source curriculum has helped more than 40,000 people become jobs equally developers. Get started
Source: https://www.freecodecamp.org/news/how-to-build-your-on-heroku-with-dokku/
0 Response to "Heroku Resarting Dyno Does Not Remove Uploaded Images"
Enviar um comentário